
First Alert Carbon Monoxide Detector Instructions: A Comprehensive Guide
First Alert provides crucial safety devices, including smoke and carbon monoxide detectors, ensuring home protection; diligent installation and maintenance are paramount for optimal performance.
Understanding Carbon Monoxide
Carbon monoxide (CO) is a colorless, odorless, and tasteless gas produced by the incomplete combustion of fuels like natural gas, propane, oil, and wood. It’s often called the “silent killer” because it’s undetectable without a detector. Exposure to CO can cause flu-like symptoms, dizziness, weakness, nausea, vomiting, headaches, and even death.
Sources of CO in the home include faulty furnaces, water heaters, fireplaces, gas stoves, and portable generators. First Alert CO detectors are designed to alert you to the presence of this dangerous gas, providing critical early warning. Proper detector placement and regular testing are vital for ensuring your family’s safety. Always prioritize ventilation and regular appliance maintenance to minimize CO risks.
What is a First Alert Carbon Monoxide Detector?
A First Alert Carbon Monoxide (CO) detector is a life-saving device engineered to sense the presence of this hazardous, invisible gas. These detectors continuously monitor the air for CO levels, sounding a loud alarm when dangerous concentrations are detected. First Alert offers a range of CO detectors designed to meet diverse needs and home configurations.
These detectors utilize an electrochemical sensor that reacts to CO, triggering the alarm. They are crucial for homes with fuel-burning appliances or attached garages. First Alert detectors adhere to stringent safety standards, including UL 217 and 2034, ensuring reliability. Regular testing and battery checks (for battery-powered models) are essential to confirm proper functionality and maintain optimal protection for your family.
Types of First Alert CO Detectors
First Alert offers several types of carbon monoxide detectors to suit various homeowner preferences and electrical setups. Battery-Operated Detectors provide flexibility in placement, as they don’t require an outlet, but necessitate regular battery checks. Plug-In Detectors with Battery Backup offer convenience with a built-in AC power source and continued operation during power outages.
Hardwired Detectors are directly connected to your home’s electrical system, often with battery backup for resilience. These typically feature an interconnected capability, meaning if one alarm sounds, all interconnected alarms will activate. Choosing the right type depends on your home’s layout, power availability, and desired level of protection. Always follow manufacturer instructions for proper installation and maintenance of each detector type.
Battery-Operated Detectors
Battery-Operated CO detectors offer portability and ease of installation, requiring no wiring or electrical outlets. They are ideal for locations where AC power isn’t readily available, or for renters. However, consistent monitoring of battery life is crucial, as a depleted battery renders the detector useless.
Regular testing – at least monthly – is highly recommended to ensure functionality. First Alert recommends using a quality 9V battery. Consider detectors with a low-battery warning chirp, providing ample notice for replacement. Placement should be away from potential sources of carbon monoxide, and in areas where occupants spend significant time. Remember, these detectors rely solely on battery power for operation, so proactive battery management is essential for reliable protection.
Plug-In Detectors with Battery Backup
Plug-in CO detectors combine the convenience of AC power with the security of battery backup. They operate using standard electrical outlets, providing continuous monitoring, but also include a battery to ensure functionality during power outages. This dual power source offers enhanced reliability compared to solely battery-operated models.
First Alert recommends regularly testing these detectors, even with the AC power connected, to verify battery functionality. The battery serves as a crucial failsafe. Pay attention to low-battery warnings, and replace the battery promptly when indicated. Proper placement remains important – avoid obstructing the detector and ensure it’s within audible range of occupants. These detectors offer a balance of convenience and dependable protection against the silent threat of carbon monoxide.
Hardwired Detectors
Hardwired carbon monoxide detectors are directly connected to your home’s electrical system, offering a consistently powered and reliable safety solution. These detectors often feature a battery backup, providing continued protection during power outages – a critical safety feature. Installation typically requires basic electrical knowledge or a qualified electrician.
First Alert hardwired models frequently interconnect with other compatible detectors, meaning if one alarm sounds, all interconnected alarms will activate, alerting everyone in the home. Regular testing is still essential, even with the hardwired connection, to confirm battery backup functionality. Ensure the detector meets all local building codes and safety standards. Proper wiring and secure mounting are vital for optimal performance and long-term safety.

Installation Instructions
Proper installation is key for effective carbon monoxide detection; carefully select locations, adhering to height recommendations, and avoid potential false alarm triggers for optimal safety.
Choosing the Right Location
Strategic placement significantly impacts a First Alert carbon monoxide detector’s effectiveness. Install detectors centrally on each level of your home, and outside sleeping areas, ensuring comprehensive coverage. Avoid obstructing airflow around the unit; maintain clear space for accurate readings.
Crucially, do not install detectors in garages, kitchens, or near fuel-burning appliances due to potential false alarms from normal combustion byproducts. Bathrooms with high humidity should also be avoided. Consider the potential for drafts or ventilation that could dilute CO concentrations.
Remember, carbon monoxide is slightly lighter than air and can disperse throughout a room, but proper placement maximizes detection probability. Following these guidelines will help ensure your detector functions optimally, safeguarding your family’s well-being.
Placement Height Recommendations

Optimal placement height is crucial for accurate carbon monoxide detection. Mount detectors between 5 and 10 feet from the floor, mirroring typical CO concentration levels. This range ensures the detector samples air within the breathing zone, maximizing responsiveness to potential hazards.
For wall mounting, position the detector approximately 6 inches from the ceiling. If mounting on a ceiling, ensure it’s at least 4 inches from any wall. Avoid placing detectors directly near ceiling fans or other sources of airflow, as this can disrupt accurate readings.
Consider the specific detector model, as some manufacturers may provide slightly different height recommendations. Always consult the included instruction manual for precise guidance. Proper height placement contributes significantly to the detector’s overall effectiveness and reliability.
Avoiding False Alarm Sources
False alarms can stem from common household sources; understanding these is vital. Avoid placing detectors near fuel-burning appliances like stoves, furnaces, fireplaces, or water heaters, as brief, localized CO emissions during startup can trigger alerts.
Humidity and cleaning agents can also cause issues. Keep detectors away from bathrooms, laundry rooms, and areas where aerosol sprays are used. Direct sunlight and extreme temperatures should also be avoided, as these can damage the sensor.
Ensure adequate ventilation around the detector. Dust and debris accumulation can interfere with its function, so regular cleaning (as per the manufacturer’s instructions) is recommended. Proper placement minimizes false alarms, ensuring reliable CO detection when truly needed.
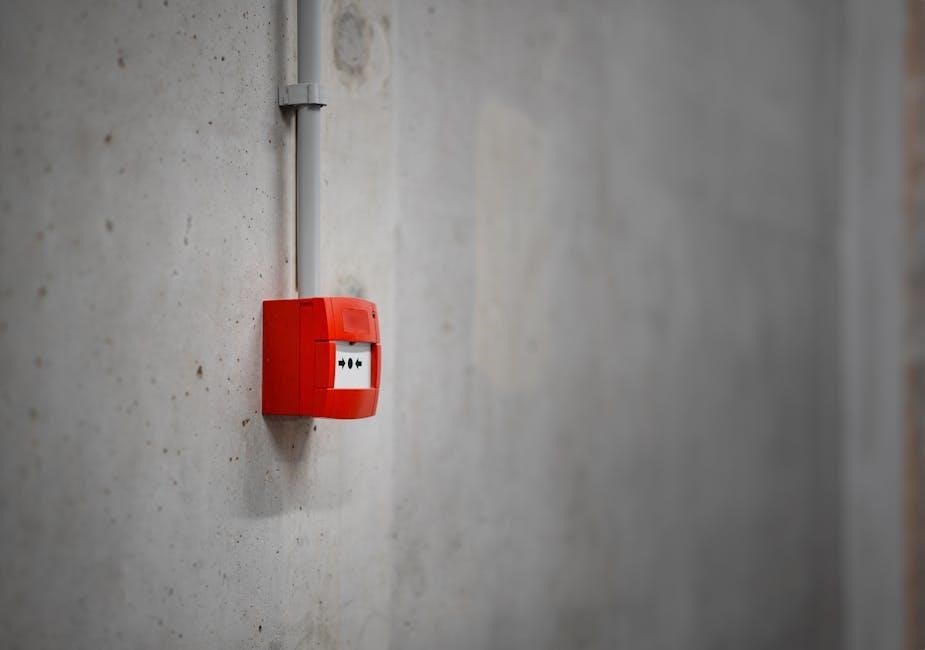
Mounting the Detector
Secure mounting is crucial for proper detector function. Before installation, verify the chosen location adheres to placement guidelines – avoiding obstructions and ensuring adequate airflow. Use the provided mounting bracket and hardware; do not substitute with different screws or anchors.
For both wall and ceiling mounting, mark the screw holes using the bracket as a template. Drill pilot holes if necessary, especially into hard surfaces. Align the bracket and securely fasten it with the screws. Then, gently attach the detector to the bracket, ensuring it clicks or locks into place.

Double-check the detector’s stability after mounting. It should be firmly attached and not easily dislodged. Refer to the specific model’s instructions for detailed mounting procedures and any unique requirements.
Wall Mounting Procedures
Begin by selecting a suitable wall location, adhering to the recommended height and avoiding potential interference sources. Utilize the mounting bracket included with your First Alert detector. Position the bracket on the wall and mark the screw hole locations with a pencil, ensuring it’s level.
Drill pilot holes at the marked locations, using a drill bit appropriate for your wall type. Insert wall anchors if necessary, particularly for drywall installations, to provide a secure hold. Align the mounting bracket with the pilot holes and securely fasten it to the wall using the provided screws.
Finally, carefully attach the carbon monoxide detector to the mounted bracket. Ensure it clicks firmly into place, indicating a secure connection. Gently test the detector’s stability to confirm it’s properly affixed to the wall.
Ceiling Mounting Procedures
For ceiling installation, identify a central location away from obstructions like light fixtures or ceiling fans. Utilize the mounting bracket supplied with your First Alert CO detector. Position the bracket on the ceiling and mark the screw hole locations with a pencil, ensuring proper alignment.
Carefully drill pilot holes at the marked spots, selecting a drill bit suited to your ceiling material. If installing into drywall, use appropriate wall anchors for a secure fit. Align the mounting bracket with the drilled holes and firmly attach it to the ceiling using the provided screws.
Gently snap the carbon monoxide detector onto the mounted bracket, verifying it locks securely into position. A slight click usually confirms a proper connection. Test the detector’s stability to ensure it’s firmly attached to the ceiling.

Operation and Maintenance
Regular testing and diligent battery replacement are vital for ensuring your First Alert carbon monoxide detector functions correctly, providing continuous safety and peace of mind.
Testing the Detector
Consistent testing is absolutely crucial to verify the operational status of your First Alert carbon monoxide detector. It’s recommended to test the detector at least monthly, though more frequent testing provides increased assurance. To perform a test, locate the ‘Test’ button on the device – typically a prominent, easily accessible feature. Press and hold this button for several seconds.
During the test, the detector should emit a loud, distinct alarm sound. This confirms the electronic circuitry, horn, and battery are functioning as expected. If no sound is produced, or the sound is weak or intermittent, it indicates a potential issue requiring immediate attention. Do not disregard a failed test; investigate the cause promptly. Remember, a silent detector offers no protection. Always refer to your specific model’s manual for detailed testing instructions, as procedures can vary slightly.
Frequency of Testing
Regular testing isn’t merely a suggestion; it’s a vital component of maintaining a safe home environment with your First Alert carbon monoxide detector. While manufacturers generally recommend monthly testing, adopting a more frequent schedule – such as weekly – can provide enhanced peace of mind. Consider tying the testing to a recurring event, like the first of the month, or a specific day each week, to ensure it doesn’t get overlooked.
Testing frequency should also be increased after any relocation of the detector, a power outage, or if you suspect the device may have been exposed to contaminants. Consistent testing verifies the detector’s sensors and alarm functionality remain reliable. Don’t assume the detector is working simply because it hasn’t alarmed; proactive testing is the only way to confirm its readiness.
How to Perform a Test
Performing a test on your First Alert carbon monoxide detector is a straightforward process, typically involving a dedicated “Test” button located on the device’s face. Press and hold this button for several seconds – usually around 5-10 seconds – until the detector emits a loud, audible alarm. This confirms the electronic circuitry, horn, and battery are functioning correctly.
Observe the alarm’s sound pattern; it should be a consistent, piercing tone. If the alarm sounds weak, intermittent, or doesn’t sound at all, it indicates a potential issue requiring immediate attention, such as a low battery or a malfunctioning detector. After the test, the alarm will automatically silence. Remember to consult your detector’s specific manual for detailed instructions, as procedures may vary slightly between models.
Replacing the Battery
Maintaining a fresh battery is crucial for your First Alert carbon monoxide detector’s reliability. Most detectors utilize a standard 9-volt battery, though some newer models may require different types – always verify the correct battery type specified in your user manual. A low battery warning, typically signaled by a chirping sound, indicates it’s time for replacement.
To replace the battery, locate the battery compartment (usually on the back or side of the detector). Gently open the compartment and remove the old battery. Install the new battery, ensuring correct polarity (+ and ⸺ terminals align). Close the compartment securely. Test the detector immediately after battery replacement to confirm proper operation. A recommended battery replacement schedule is at least once a year, or whenever the low-battery warning activates.
Battery Type Required
Determining the correct battery type for your First Alert carbon monoxide detector is essential for its functionality and your safety. While the vast majority of First Alert CO detectors traditionally utilize a standard 9-volt battery, advancements in technology have led to models requiring alternative power sources.
Always consult your detector’s user manual to confirm the precise battery type needed. Using an incorrect battery can lead to malfunction or prevent the detector from operating correctly. Some newer detectors may employ lithium batteries for extended life and reliable performance. Never substitute a rechargeable battery unless explicitly permitted by the manufacturer. Ensure the battery is fresh and has not exceeded its expiration date for optimal protection.
Battery Replacement Schedule
Regular battery replacement is critical for maintaining the reliability of your First Alert carbon monoxide detector. A general guideline is to replace the battery at least once a year, however, more frequent replacements may be necessary depending on usage and environmental factors.
Many detectors feature a low-battery warning, typically a chirping sound, indicating it’s time for a change. Do not ignore this signal! It’s best practice to replace the battery during daylight saving time, as a convenient reminder. Even if the detector isn’t chirping, annual replacement ensures continuous protection. Always use a fresh, quality battery of the correct type as specified in the user manual. Prompt battery replacement is a simple step that significantly enhances your home’s safety.

Understanding Alarms and Indicators

Distinct alarm patterns signal different issues; understanding these alerts – CO detection, low battery, or malfunction – is vital for a swift and appropriate response.
What Does the Alarm Sound Mean?
First Alert carbon monoxide detectors utilize specific alarm patterns to communicate the nature of the detected hazard. A series of four beeps, followed by a pause, indicates the presence of carbon monoxide. This pattern repeats when CO is detected, escalating in frequency as the concentration increases. It’s crucial to immediately evacuate the premises and call emergency services upon hearing this alarm.
Conversely, a single chirp every 30-60 seconds signifies a low battery condition, requiring prompt battery replacement. A different alarm sequence, often a continuous or varying tone, may indicate a detector malfunction, necessitating inspection or replacement. Familiarizing yourself with these distinct sounds is paramount for a quick and effective response, ensuring the safety of yourself and your loved ones. Always consult the detector’s manual for precise alarm definitions specific to your model.
Silence Feature Operation
First Alert CO detectors often feature a silence or hush button, designed for temporary alarm silencing – primarily for nuisance alarms caused by brief, non-threatening CO spikes. Pressing the silence button typically mutes the alarm for a predetermined period, usually several minutes. This feature does not address the underlying CO issue; it merely provides temporary relief from the audible alert.
It’s vital to understand that silencing the alarm doesn’t eliminate the carbon monoxide danger. After the silence period expires, the alarm will reactivate if CO is still present. Never disable the detector permanently or ignore repeated alarms. Always investigate the source of the alarm, even after using the silence feature, and ensure proper ventilation. Refer to your detector’s manual for specific silence button operation instructions, as procedures can vary between models.
Low Battery Warning
First Alert carbon monoxide detectors utilize a distinct low-battery warning signal – typically a short, intermittent chirp – to alert users when the battery power is dwindling. This warning is not the same as the alarm sound for detected CO; it indicates the detector’s ability to function reliably is compromised. Ignoring this warning can leave you unprotected, as a depleted battery renders the detector ineffective.
Upon hearing the low-battery chirp, immediately replace the battery with a fresh one of the correct type, as specified in the detector’s manual. Do not attempt to use rechargeable batteries unless explicitly permitted by the manufacturer. After battery replacement, test the detector to confirm proper operation. Consistent low-battery warnings, even with new batteries, may indicate a detector malfunction requiring replacement.

Troubleshooting Common Issues
First Alert detectors may experience false alarms, malfunctions, or end-of-life signals; addressing these promptly ensures continued safety and reliable carbon monoxide detection capabilities.
False Alarm Prevention
First Alert carbon monoxide detectors are designed for accuracy, but false alarms can occur. Common causes include exposure to exhaust fumes, especially from vehicles or generators operated too close to the detector – always use battery-powered CO detectors with generators.
Avoid placing detectors near fuel-burning appliances like stoves, furnaces, or fireplaces, as brief, normal emissions can trigger alerts. Ensure adequate ventilation in areas with these appliances. Dust, humidity, and cleaning chemicals can also cause false alarms; regularly clean the detector with a soft cloth.

Test the detector frequently to confirm proper functionality. If false alarms persist, relocate the unit to a different area, following recommended placement guidelines. Remember, a malfunctioning detector requires immediate replacement to maintain safety.
Detector Malfunction
If your First Alert carbon monoxide detector isn’t functioning correctly, immediate action is crucial. Consistent chirping, even after a battery replacement, often indicates a detector nearing its end-of-life and requires replacement – do not ignore this signal.
A detector that fails to respond during self-testing or doesn’t alarm when exposed to a known CO source is also malfunctioning. Do not attempt to repair the unit; CO detectors are sealed and contain sensitive sensors. Discard the faulty detector responsibly, following local regulations.
Ensure the replacement detector meets current safety standards (UL 217 and 2034); Regularly testing and maintaining your CO detector are vital, but a malfunctioning unit offers no protection and must be replaced promptly to safeguard your home and family.
End-of-Life Signal
First Alert carbon monoxide detectors have a limited lifespan, typically around 5-7 years, after which their sensors can become unreliable. To alert you, the detector will emit a distinct end-of-life signal – usually a series of chirps or a specific alarm pattern, differing from low-battery warnings.
This signal isn’t a malfunction; it signifies the detector has reached the end of its operational life and must be replaced. Ignoring this signal compromises your safety, as the detector may no longer accurately detect carbon monoxide.
Locate the manufacture date on the back of the unit to determine if it’s nearing its end-of-life. Replace the detector immediately with a new one, ensuring continued protection against the silent, deadly threat of carbon monoxide. Proper disposal of the old unit is also essential.